-
Carla Tote Bag

This Carla Tote Bag is the perfect lightweight and stylish bag for all your sunny adventures! Whether you're heading to the beach, market, or a casual day out, this tote is both functional and fashionable. Made with breathable cotton yarn, it's sturdy yet soft, making it an ideal summer companion.


Pattern Features:
- Beginner-friendly with simple stitches
- Spacious and durable for everyday use
- Works up beautifully in cotton yarn
- Perfect for summer outings, beach trips, and market days
Pattern Notes:
- The bag starts from the bottom, worked flat in rows (back and forth) from Row 1 to Row 4.
- After Row 4, the pattern shifts to the body of the tote, worked seamlessly for a smooth and sturdy finish.
- Handles are attached at the end for a clean and professional look.
- Laying flat size: Width 10.5” X Length 11.5” (handle not included)
- Foundation Chain: Multiples of 7 + 6
Materials Needed:
Yarn Weight: Worsted Weight 100% cotton yarn (#4)
Yarn: Dapper Dreamer Combed, Cotton Peanut, (10-ply), 300 yards (1/2 cone)
Hook size: 4.50 MM [US G-7]
Terms Used:
All terms are in USA terminology
Ch: Chain
Sc: Single Crochet
Dc: Double Crochet
Sl st: Slip Stitch
Sp: Space
Sk: Skip
Gauge:
9 sts X 4 rows = 2 inches in dc
Bag Base Instructions:
Row 1: Ch 46, dc in 5th ch from hook and in each sts across (consider ch 3 as first dc). [43 dc]
Row 2 to 3: Ch3, turn, Dc in next st and in each sts across. [43 dc]
In the next row, we will begin working on the tote bag's body. Do not cut the yarn.
Bag Body Instructions:
Round 1: Ch3 (consider as 1st dc), turn, dc in next st and in each sts across, but having 4 dc in last st, continue to the side, 2 dc in next dc post, (dc in next joined st, 2 dc in next dc post) twice, 4 dc in first dc st of the other side, dc in each sts across, in last st put 3 dc ( to complete the 4-dc-set of the corner), sl st in 1st dc. [111 dc]

Round 2: Ch 3 (consider as 1st dc), turn, 2dc in the same st, sk next 2 dc, sc in next dc, ch 3, sk next 3 dc, *3 dc in next dc, sk next 2 dc, sc in next dc, ch 3, sk next 3 dc, rep * around, end w/ sl st in 1st dc to join. [16 sets of 3-dc]
Round 3: Ch 1, turn, sc in the same st, ch 3, sk next 3 ch, 3 dc in next sc, sk next 2 dc, *sc in next dc, ch 3, sk next 3 ch, 3 dc in next sc, sk next 2 dc, rep * around, end w/ sl st in 1st sc to join. [16 sets of 3-dc]

Round 4: Ch 3 (consider as 1st dc), turn, 2dc in the same st, sk next 2 dc, sc in next dc, ch 3, sk next 3 ch, *3 dc in next sc, sk next 2 dc, sc in next dc, ch 3, sk next 3 ch, rep * around, end w/ sl st in 1st dc to join. [16 sets of 3-dc]
Round 5 to 23: Repeat round 3 and round 4, end w/ round 3.
Round 24: Ch 1, turn, sc in the same st, sc in each of next 3dc, *3 sc in next 3 ch sp, sc in each of next sc and 3dc, rep * around, end w/ sl st in 1st sc to join.
Round 25: Ch 1, sc in the same st and in each sts around, end w/ sl st in 1st sc to join. Fasten Off.
Handle Instructions:

Reminder: The handle is designed to be slightly shorter as it will stretch about 1 inch with use.
1st Handle:
Row 1: Skip 7 sts (including the st where you joined), Attach yarn in 8th st from the place you cut off the yarn on last stitch, ch 1, sc in the same st and in each of next 3 sts. [4 sts]
Row 2: Ch 1, turn, sc in each of rem sts. [ 4 sc]
Row 3 to 64: Repeat row 2
Row 65: Repeat row 2, sk 23 sc of the bag, by using sl st attach the handle on next sc, sl st the bag and the handle together. Cut the yarn.
2nd Handle:
Skip 23 sc, attach yarn in next sc. Repeat the 1st handle row 1 to 65.
Fasten off.
--- END ---

-
-
Recent Articles
-
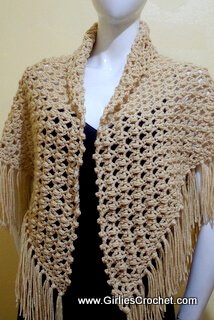
8 Free Triangular Shawl Patterns to Crochet for Mother’s Day
Apr 15, 25 08:24 AM
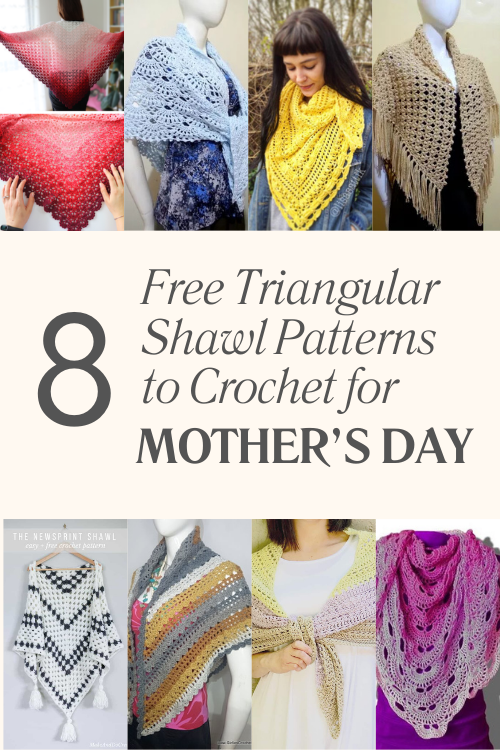 Make Mother’s Day special with a handmade crochet shawl a meaningful way to wrap your love around her
If you like to support my work as a crochet designer, buy me a cup of coffee.
-
Everything You Need To Build An Online Business - Solo Built It!


Popular Free Crochet Pattern

Like us on Facebook
If you like to support my work as a crochet designer, buy me a cup of coffee.
-
Girlie's Crochet and GirliesCrochet.com are © and TM 2013-2024 of Girlie D. de los Reyes .
All rights reserved.
Disclaimer l Privacy Policy l About Me l Home
"BE BLESSED AND BE A BLESSING IN 2025"


New! Comments
Have your say about what you just read! Leave me a comment in the box below.